OK, so the Ardennes can get a tad bleary, snow blindness and all. So, we shifted back to Holland in September (1944 of course!) for another chance to use the recently painted Late War kit. We have a bunch of Panthers, Mobelwagons, 3.7 inch AA guns and even a horde of sdkfz 251/21Ds to use. We adapted a scenario out of the Command Decision, Test of Battle, Operation Market Garden Book by Jake Strangeway (Scenario 8: "The Beginning of the End." 107th Panzer Brigade cuts Hell's Highway). The forces were scaled down to FOW equivalent so where the Germans might have a battalion, they get a weak platoon. The Americans get HUGE Fearless Veteran US Paratrooper platoons which are hard to break. The Germans get a fair amount of armor, which even if it is only Confident Trained, it still is pretty good. Especially when all the Allies initially have are 57mm AT Guns and bazookas. It looked like a good scenario and one of us has been valiantly painting away on sdkfz 251/21Ds, so we decided to give it a try and let Bastogne rest for a bit.
 |
| The Map from Operation Market-Garden, by Jake Radey. The terrain is mostly open fields with the built up areas in Vegel. The canal is impassable except at the two bridges. |
 |
| Our interpretation of the scenario map. Since out table is a bit shorter and wider than the scenario map, we squished some things in and elongated some other distances. |
 |
| Another view of the terrain setup. There are a lot of Germans and they all come in on turn one. This is not good for the Allies. |
 |
| The Germans are somewhat a haphazard collection of units. Command Decision's morale rules are more variable than Flames of War, so most Germans were Confident Trained with the exception of the SS Panzergrenadiers from SS Panzergrenadier Regiment 22 who were Fearless Veterans. |
 |
| There are a LOT of FV US Paratroopers but only one platoon is on the board on turn one. This is bad for the Allies. |
 |
| Initial setup for the Germans. There are a bunch of sdkfz 251/21Ds, though not seven as the scenario calls for. We only had six. Even our insanity has bounds . . . |
 |
| Kampfgruppe Walther masses near Vegel. |
 |
| The 2nd Battalion, 501st sets up in Vegel and is mostly hidden in the houses. This is wise as they will need all of the bullet proof cover they can get. |
 |
| A British 3.7 inch AA gun and a Bofors 40mm gun are limbered on the road approaching Vegel. |
 |
| Another view of the 3.7 inch gun. It looks really neat but didn't accomplish anything in the game. |
 |
| The 40mm Bofors at least killed a few SS stands later in the game. |
 |
| Looking across the canal into Vegel. |
 |
| The other bridge. |
 |
| The SS Panzergrenadiers set up in the fields near the US positions in Vegel. These poses are also nice and are probably my best painted Germans. |
 |
| More Germans from Kampfgruppe Walther prepare to attack. |
 |
| The Germans move out and towards the US Paratroopers in Vegel. This takes time as there are a lot of Germans and only so much space. |
 |
| Kampfgruppe Walther moves through Erp. |
 |
| The tail end of the German column. |
 |
| Other Germans skirt the outskirts of Erp and head through the fields. |
 |
| This attracts the attention of the Americans who promptly lay down a 75mm pack howitzer barrage on the platoon representing elements of the 16th Grenadier Regiment, 180th Infantry Division. They did not achieve much in the game other than to absorb incoming fire and produce casualties. |
 |
| They unpin and move out. For now . . . |
 |
| SS Panzergrenadiders and Wehrmacht engineers move into Vegel screened by armor. |
 |
| The rest of the Germans avoid the position of the last US barrage. |
 |
| German 120mm mortars bombard the Americans but cause few casualties. These stands are Peter Pig figures as I liked these better than the Battlefront offering a few years ago. |
 |
| German armor nose its way into Vegel. |
 |
| Another view. They cause little damage but are essentially invulnerable to any US weapon. |
 |
| SS Panzergrenadiers assault a key position in the US defenses. Only two stands were able to get close enough to the house to assault, but the Americans had been pinned by all of the fire coming from the 120 mm mortars, panzergrenadiers and panzers, so I rolled the dice and assaulted. |
 |
| Amazingly enough defensive fire fails to shred the SS Panzergrenadiers. The assault goes in and one US stand is killed. The Paratrooper fail their morale and route across the street to the green house. |
 |
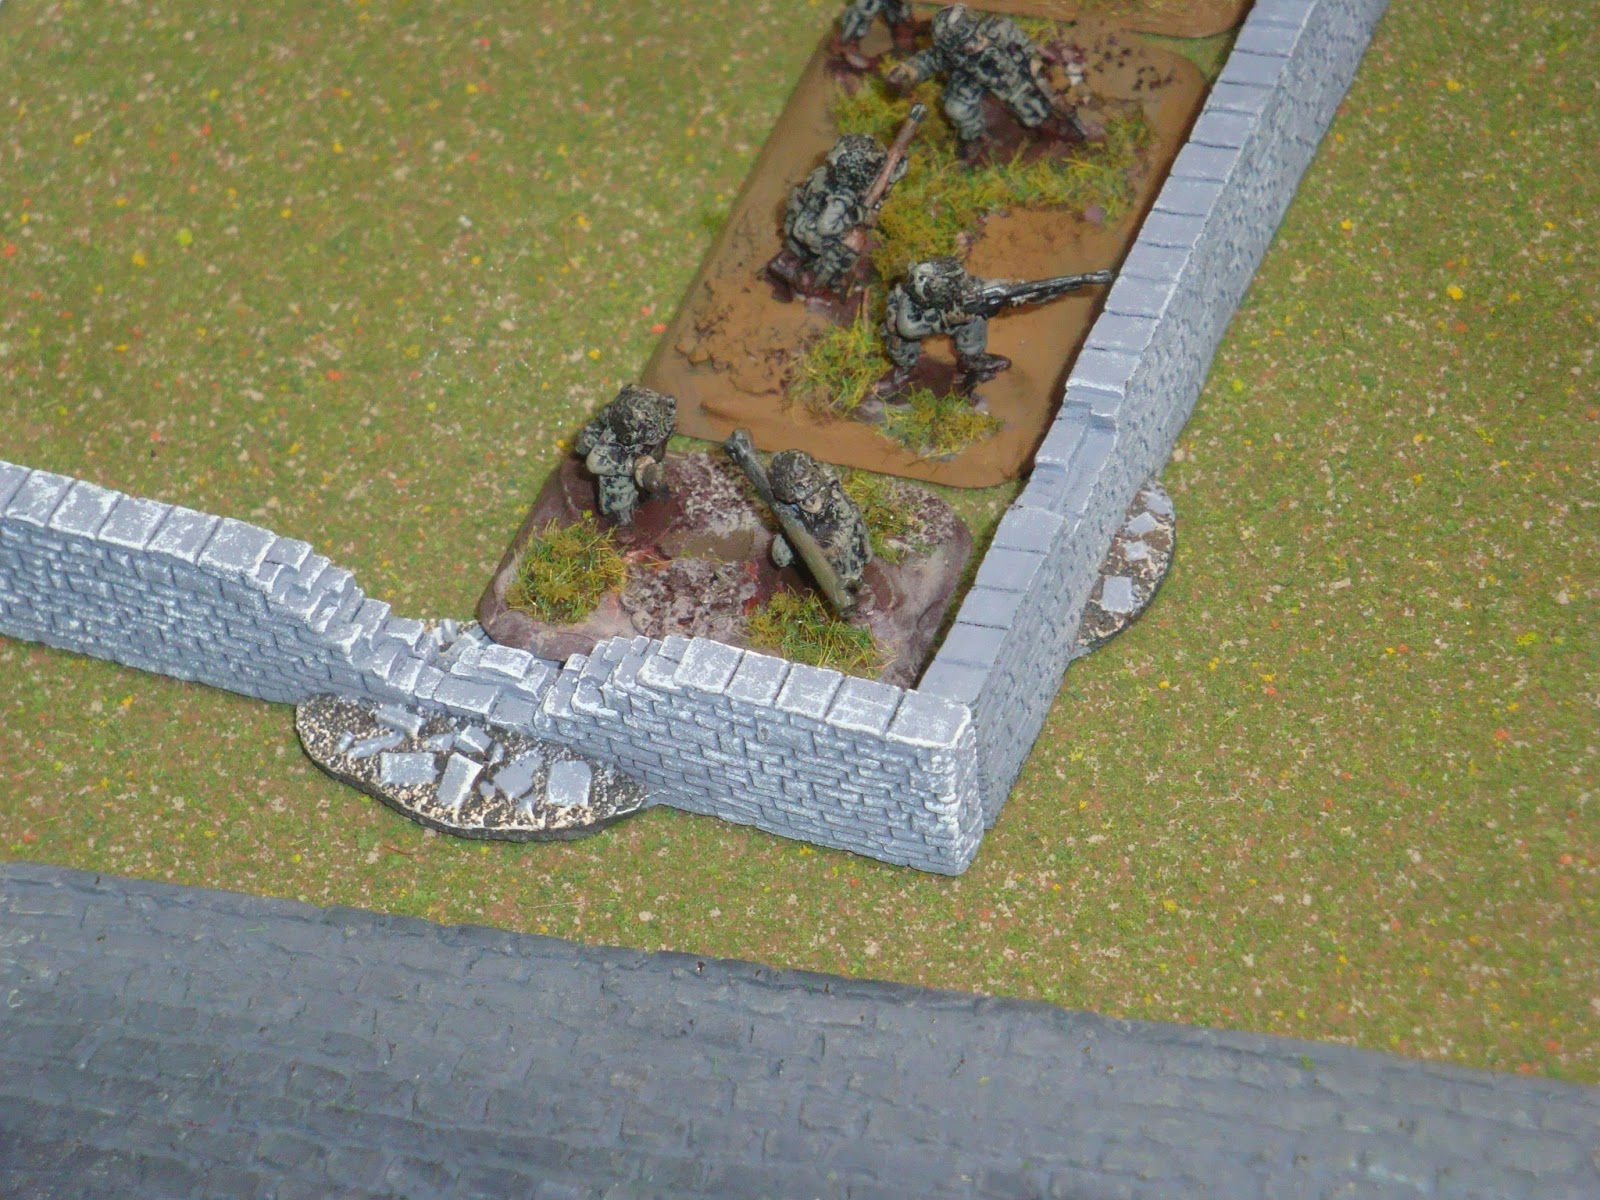
| The SS Panzergrenadiers carry the position and consolidate. This is probably the key event in the game as the Germans captured this house and used it to slowly whittle down the Americans with superior fire power and numbers. |
 |
| With a key position next to the bridge, the rest of the Germans move up to rain down fire on the dug in Americans. |
 |
| The 16th Grenadiers get pinned again. |
 |
| There are 5 Panthers, 2 Jagdpanzer IV/L70s and a Jagdpanzer IV/L48 pounding away on the Americans. The two sdkfz 261/16D flamethrower halftracks get ready to dose the green corner house with fire after which the German engineers will close assault. |
 |
| Most of the Americans are in the houses but some are dug in behind the stone fence. |
 |
| Turn Three: US reinforcements from the 2nd battalion, 506th Regiment start down the road. |
 |
| Bofors 40 mm AA gun bangs away at the SS Panzergrenadiers and actually kills a stand. |
 |
| The 3.7 inch AA gun fires at the massed German armor across the canal and hits nothing. Ever. They must have thought the tanks were not the Luftwaffe and it was unsporting to shoot against them. Or the Americans just rolled horribly. |
 |
| German engineers prepare to assault. This is a small platoon but the SS Panzergrenadiers took a long time to rally after their successful assault so the engineers with the halftracks were sent in. |
 |
| Bazooka fire was generally rotten as well. |
 |
| SIX sdkfz 251/21Ds mass to make sure no American reinforcements can get across the bridge. |
 |
| German shooting gallery against US Paratroopers keeps them pinned and kills a stand here and there. |
 |
| Meanwhile, a German Panzergrenadier platoon is sent to Marienheide to take that objective. |
 |
| Everybody takes a turn shooting at the Americans. I have taken my fair share of gammon bombs and decline to assault for now. |
 |
| German 120 mm mortars at Erp fire but with only a two gun battery don't cause much damage. |
 |
| Finally! After getting pinned down for a turn, the German engineers rally and move up to close assault the Paratroopers in the green cafe. The sdkfz 251/16D is deadly, killing three US stands before it runs out of fuel. |
 |
| Another view. This is a newly painted unit which should have been destroyed by now, but they did great here. |
 |
| Turn 4: US reinforcements from the 3rd Battalion, 327th Glider Infantry Regiment show up near Uden. |
 |
| They move down the road to attack the Germans near Marienheide. |
 |
| Meanwhile the 2nd Battalion of the 506th approaches the scene of the German attack. |
 |
| The surviving Paratroopers in the green cafe repulse the German engineers and even destroy the offending sdkfz 251/16D halftrack. But there aren't many Americans left. |
 |
| The glider infantry move up to attack the Germans at Marienheide. |
 |
| Meanwhile another German Panzergrenadier company moves up to close assault the Americans in the green cafe. |
 |
| The surviving German engineer command stand is very brave, but the platoon is about to route. |
 |
| Germans take position in the Marienheide Railroad station. |
 |
| A Mobelwagon moves up to support the Panzergrenadiers. |
 |
| Another view of a new unit on the field of battle. |
 |
| Colonel Frost would be proud of the American defense at Vegel. |
 |
| The German engineers route off of the table. |
 |
| British Armour from the 44th Royal Tank Regiment arrive but are not excited about sallying over the bridge to encounter the Panthers. |
 |
| The Brits join the queue waiting to get over the bridge. |
 |
| The glider infantry continue their advance helped by a smoke screen that obstructs the Mobelwagon line of sight. |
 |
| And then there were only five . . . Germans lose a sdkfz 251/21D halftrack to bazooka fire. |
 |
| American artillery fire pins the Panzergrenadiers near the RR station at Marienheide. |
 |
| With more Allied reinforcements arriving and the number of fearless veteran Paratrooper stands in Vegel decreasing, the Germans launch an all out assault on the Paratrooper positions. |
 |
| The Americans, perhaps 5 stands left out the initial 17, route off the board leaving the Germans in control of Vegel. |
 |
| The Germans consolidate and the surviving sdkfz 251/16Ds get out of the way before the British Shermans can destroy them. |
 |
| Another view of the German success. |
 |
| It is getting late in the day but perhaps the glider infantry can salvage the Allied defense. They move up to Marienheide under fire from the Panzergrenadiers, their halftracks and the Moblewagon. |
 |
| Paratroopers from the 506th try to attack over the bridge. Finally. |
 |
| Another US Paratrooper platoon representing the 3rd Battalion of the 506th moves toward the RR bridge over the canal. |
 |
| There are no Germans here. Yet . . . |
 |
| Mobelwagon fire near Marienheide takes out a Paratrooper stand. |
 |
| A glider 37 mm AT gun moves up to shoot at the Mobelwagon. This is another new unit fresh on the table. |
 |
| British tanks, artillery and AA guns plaster the Germans but not enough to pin them all. |
 |
| Another British Sherman platoon shoots up the sdkfz 251/21Ds but only manage to bail out three. They later rally and run away. |
 |
| With the US force in Vegel defeated, the Germans redeploy to defend the RR bridge and send more troops down to Marienheide. |
 |
| Even Easy Company can't get across the bridge. The US Paratroopers lose three stands and get pinned. There are too many Germans with too high rates of fire. |
 |
| The sdfkz 251/21Ds get away! |
 |
| Panthers head to the RR bridge. |
 |
| This is perhaps the second time the Panthers have made an appearance and they did pretty well. |
 |
| Allied forces on the wrong side of the canal have few options, and none of them are good. |
 |
| The glider infantry have a chance . . . |
 |
| Against all odds the 37 mm AT gun hits and destroys the Mobelwagon! The crew rejoices! |
 |
| The Mobelwagon burns. |
 |
| Everyone is amazed the 37 mm AT gun did anything in a Late War scenario. |
This was the last shot of the game as the Allied player decided that the Germans were in a strong position and could not be really dislodged. The scenario was not really unbalanced. German initial attacks were successful and the Americans really couldn't match the firepower of the German panzer brigade. I think the morale in Command Decision would have dulled some of the German initiative as they German units weren't that good at this point in the war. American die rolling was atrocious. I think we will play this one again, though it may be awhile.


1 comment:
Great looking terrain and kit.
Post a Comment