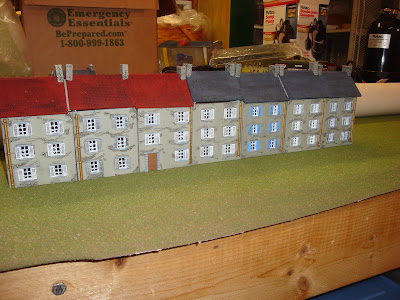
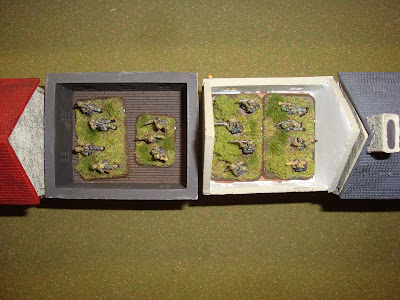
One of the reasons I painted the SS LW ATG platoon was to play the scenario "String of Pearls" from the "Cobra" supplement. The scenario posits a strong thrust by a US armored force against a reduced strength SS panzergrenadier force holding a crossroads. The Germans need to hold the crossroads to allow a string of overloaded trucks to retreat. As such, how many SS Stands get obliterated is inconsequential as long as the trucks get away. I painted the ATG gun teams to give each reduced strength SS panzergrenadier zug their own gun in accordance with the scenario. I didn't have an SS pioneer platoon painted so I had to use some regular Germans in regular uniforms. I don't have any US LW armored forces either, so my son pulled out the reluctent veterans of the British 7th Armored Division to have a go. Since they don't have hedgerow cutters or bulldozers, this may seem a bit unfair. Still, with over 2300 points to spend on, they weren't exactly weak.
The German player has 3 reduced strength panzergrenadier zugs, each with 4 MG stands, a 75mm pak 40 ATG and a command panzerfaust SMG stand. There is also a pioneer platoon with 4 MG teams and a command panzerfaust SMG stand. The company HQ has two command panzerfaust SMG teams and 2 panzerschrek teams. A spare Panzer Mk IV H is also at the crossroads. All teams start the game dug in and gone to ground. A reduced strength panzer zug with 2 Panzer Mk IV Hs is available.
The British took a full armored squadron with 4 armoured troops, each with 3 Cromwells and a Firefly. The company command has 2 Cromwells, 2 CS Cromwells and a Cromwell ARV. A full Sexton battery supports the advance, while a recce platoon with 3 Stuart Mk Vs, a motor platoon and an infantry platoon provided additional targets. Two of the armoured troops start the game as possible reinforcements. I thought the full Sexton battery with 8 tubes would make up for the relative lack of mobility. Nope.
 |
| British troops mass to attack the crossroads. A long column of overloaded German trucks struggle to get the heck out of the way. |
 |
| Stalwart SS panzergrenadiers dig in at the crossroads with a well placed mine field to discourage the reluctant veterans of the 7th Armoured Division. |
 |
| The German right flank. |
 |
| The German center with panzerpioneer zug in the rear as reserves. The one panzergrenadier zug and company HQ are in the bombed out buildings. |
 |
| The Trained German trucks want to get out of here before the RAF shows up. |
 |
| Initial move by Brits discovers the minefield. British immediately fail motivation check and dawdle at the edge. |
 |
| HQ troop moves up to the hedgerow and shells the buildings . . . to no avail. |
 |
| SOME British tanks get over the hedgerow. The lack of hedgerow cutters caused the tank attack to lose cohesion early in the game. |
 |
| British infantry and tanks move up in the center. |
 |
| "Floor it Hans! This is 'Death Race' 1944!" German trucks move towards the crossroads. |
 |
| Stuck at the minefield, the recce troop loses a Stuart and has another bailed out. Ouch! |
 |
| The British Armoured Squadron CO goes for broke! He crosses the hedgerow and runs through the village oblivious to the panzerfaust fire to stop the trucks before it is too late. Things don't look good for Hans. |
 |
| Meanwhile the Stuarts continue to act dispirited while the infantry moves slowly. Another armoured troop avoids the minefield and moves through the woods at upper right. |
 |
| Hans AND Frans get lit up. Two trucks are destroyed by the British Armoured Squadron CO. |
 |
| With the center under assault, a British armoured troop attacks a dug in SS panzergrenadier zug with attached 75mm pak 40. British artillery fails to range in though, which could be a minor problem. |
 |
| Fire fails to destroy or pin the platoon, and two tanks get hung up on the hedgerow. |
 |
| The Brits still win the assault, killing a MG stand and causing the Fearless SS Vets to show fear. The gun team is stuck though against the rear hedgerow, which is not good. |
 |
| The melee at the crossroads. Currently unburning German trucks wind their way through the inferno while everyone else lines up to shoot or assault the courageous British HQ troop. |
 |
| The cornered pak 40 tires to kill the incoming British tanks but only bails out the Firefly. |
 |
| Meanwhile the Stuarts continue to explode at the minefield. |
 |
| Panzerschrek teams in the houses are sufficient to keep the British tanks at bay. Of course, the minefield helps. |
 |
| Action at the crossroads. The panzer Mk IV H and one pak 40 ATG kill the Squadron CO and 2ic. Pioneers go in for the kill . . . and promptly lose 2 MG teams from defensive fire. They then fail to kill the Cromwell CS tank. The Cromwell then breaks off in the opposite direction and heads back up the road towards (relative) safety. |
 |
| Pioneers consolidate and allow the remaining trucks to pass. |
 |
| British armoured squadron in a stern chase after the retiring German trucks. |
 |
| The last Stuart brews up. |
 |
| British tanks dispatch two SS MG teams and threaten the road. |
 |
| German trucks make a high speed turn and head south to Falaise . . . |
 |
| The German right flank leaves a thin screen of antitank gusn to cover their withdrawal. |
 |
| With the British tanks hung up on the hedgerows, the German trucks accelerate away! |
 |
| An infantry platoon braves the minefield . . . and gets pinned down as they lose a team. |
 |
| German scattered reinforcements arrive on the left flank, to the consternation of the British player. |
 |
| Panzerfaust armed panzergrenadiers assault the British tanks under covering fire from the panzers. |
 |
| Another burning Cromwell. |
 |
With the British attack stymied on both flanks and the center, the German trucks escape!
|
This is NOT a great scenario for the British forces. Without the added mobility capabilities that the hedgerow cutters and bulldozer provides, the British are forced to go over the hedgerows and hope for the best. The resulting disruption of the force from tanks hung up on the hedgerows or burning in the minefields more than made up for the additional firepower that the Sextons provided. The British artillery killed a total of zero stands during the game. With the German trucks out of the way and essentially unreachable, the British player conceded in a gentlemanly manner, as appropriate for a member of the 4th CLY.


