In the continuing winter wonder land of the Ardennes, we played another game in and around the Belgium town of Foy. In
Rendevous with Destiny, the authors recount a German counterattack on the 14th of January, 1945, consisting of 14 Panzers and about a battalion of infantry which forced the Americans out of Foy, a town that had only been captured the day before. While we don't have a full battalion of Germans in winter camouflage, we decided to have a go using the Hold the Line Mission and a strength of 1505 points.
The Germans had:
Panzergrenadier HQ
2 Panzergrenadier platoons with attached panzerschrek team
Heavy platoon with 2 MG42 teams and 4 mortar teams
2 Panzer platoons each with 4 Panzer MK IVs (I only have Hs so they had to look like Js)
All are Confident Veteran, though at this stage in the Battle of the Bulge, confidence may have been waning. . . .
The Americans had a bunch of Paratroopers . . .
Company HQ
Three paratrooper rifle platoons with 6 rifle teams, a command team, two bazookas and a 60mm mortar team
A LMG platoon with 4 LMG teams and a bazooka. Most were combat attached to the three rifle platoons
Mortar platoon with 4 81mm mortars
Sherman platoon with 2 76mm and a 75mm Sherman
AT platoon with three 57mm AT guns
The terrain north of Foy looked pretty open so I just used some snow drifts that I had received for Christmas and the normal woods as the border. Since most of the US force is off the board in delayed reserves, I thought I had a decent chance to strike hard at one objective before the rest of the Americans showed up.
 |
| Looking south towards Foy along the Noville-Foy road. The terrain is open and filled with hard packed snow, ready for fast moving Panzers. |
 |
| The Americans dig in with a full rifle platoon with attached LMGs and a mortar platoon in support. |
 |
| A new pond and snow drift adds color. |
 |
| Herr Wittman's abandoned Tiger I somehow made its way to Foy. Odd . . . |
 |
| Elements of Panzer Lehr mass north of the forests. |
 |
| A nice winter scene. |
 |
| Panzer Mk IV Hs and a lot of LW BOTB PGs. |
 |
| The Late War German Infantry in winter camouflage figures are superb! |
 |
| The German attack burst through the deep woods. |
 |
| Unfortunately there are miles to go before they can get to either objective. |
 |
| There is a long distance to advance over the open snow. |
 |
| The Panzers move through a gap in the woods with the Panzergrenadiers close behind. |
 |
| US mortar fire pins a PG platoon as it hits the edge of the woods. |
 |
| Luckily the platoon rallies and continues to advance. |
 |
| German fire from the Panzers destroys a dug in Paratrooper team. |
 |
| The German advance continues. |
 |
| German leaders exhort their men to attack. |
 |
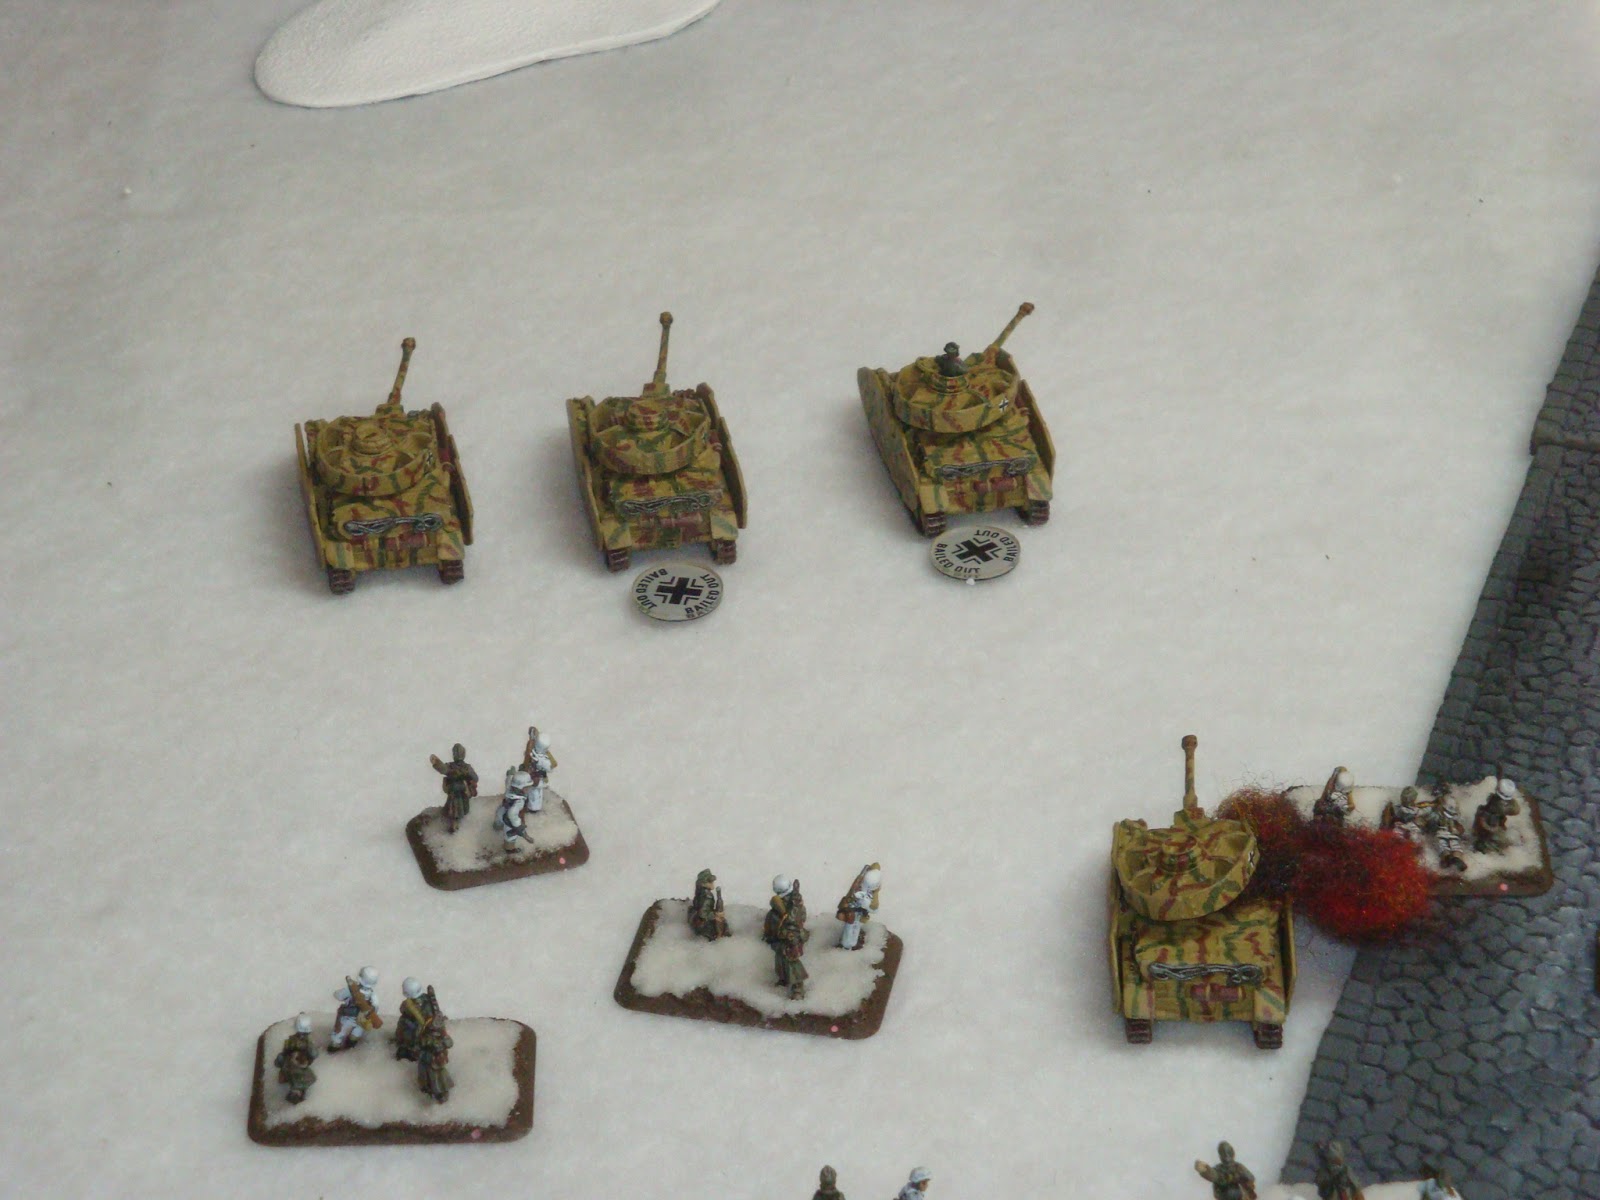
| A Paratrooper six pounder ATG platoon emerges from ambush and shoots at the advancing German Panzers. |
 |
| The antitank guns brew up a Panzer Mk IV and bail out another. They would cause some more damage but the German save die rolls were amazing. I once rolled five 6's in a row to prevent further damage. |
 |
| A clear line of sight is not enough to stop the German advance. |
 |
| The advance continues! |
 |
| The six pounders continue to annoy the German right flank Panzers. |
 |
| Two more Mk IVs bail out but survive. |
 |
| The Germans focus on the US Paratroopers guarding the objective. Dug in, gone to ground, Fearless Veterans, are hard to hit let alone destroy. |
 |
| A few teams are destroyed but the rest hold their fire. |
 |
| US mortar fire pins an advancing PG platoon again. |
 |
| The Panzers continue to advance, trying to pin the Paratroopers while the PGs attempt to rally. |
 |
| The right flank PGs advance past the bailed out Mk IVs. |
 |
| Reinforcements finally arrive! |
 |
| Shermans from the 6th Armored Division head up through the town square to assist the defense. |
 |
| You can only roll so many sixes . . . Another Mk IV buys the farm. |
 |
| The Germans are trying to get close enough to assault but the mortars pin another PG platoon. |
 |
| US fire kills half of the remainder. I am starting to run out of Germans . . . |
 |
| The HMGs fire at the annoying American AT guns and kill one. |
 |
| The gunners are down one gun, but they stay and continue the fight. |
 |
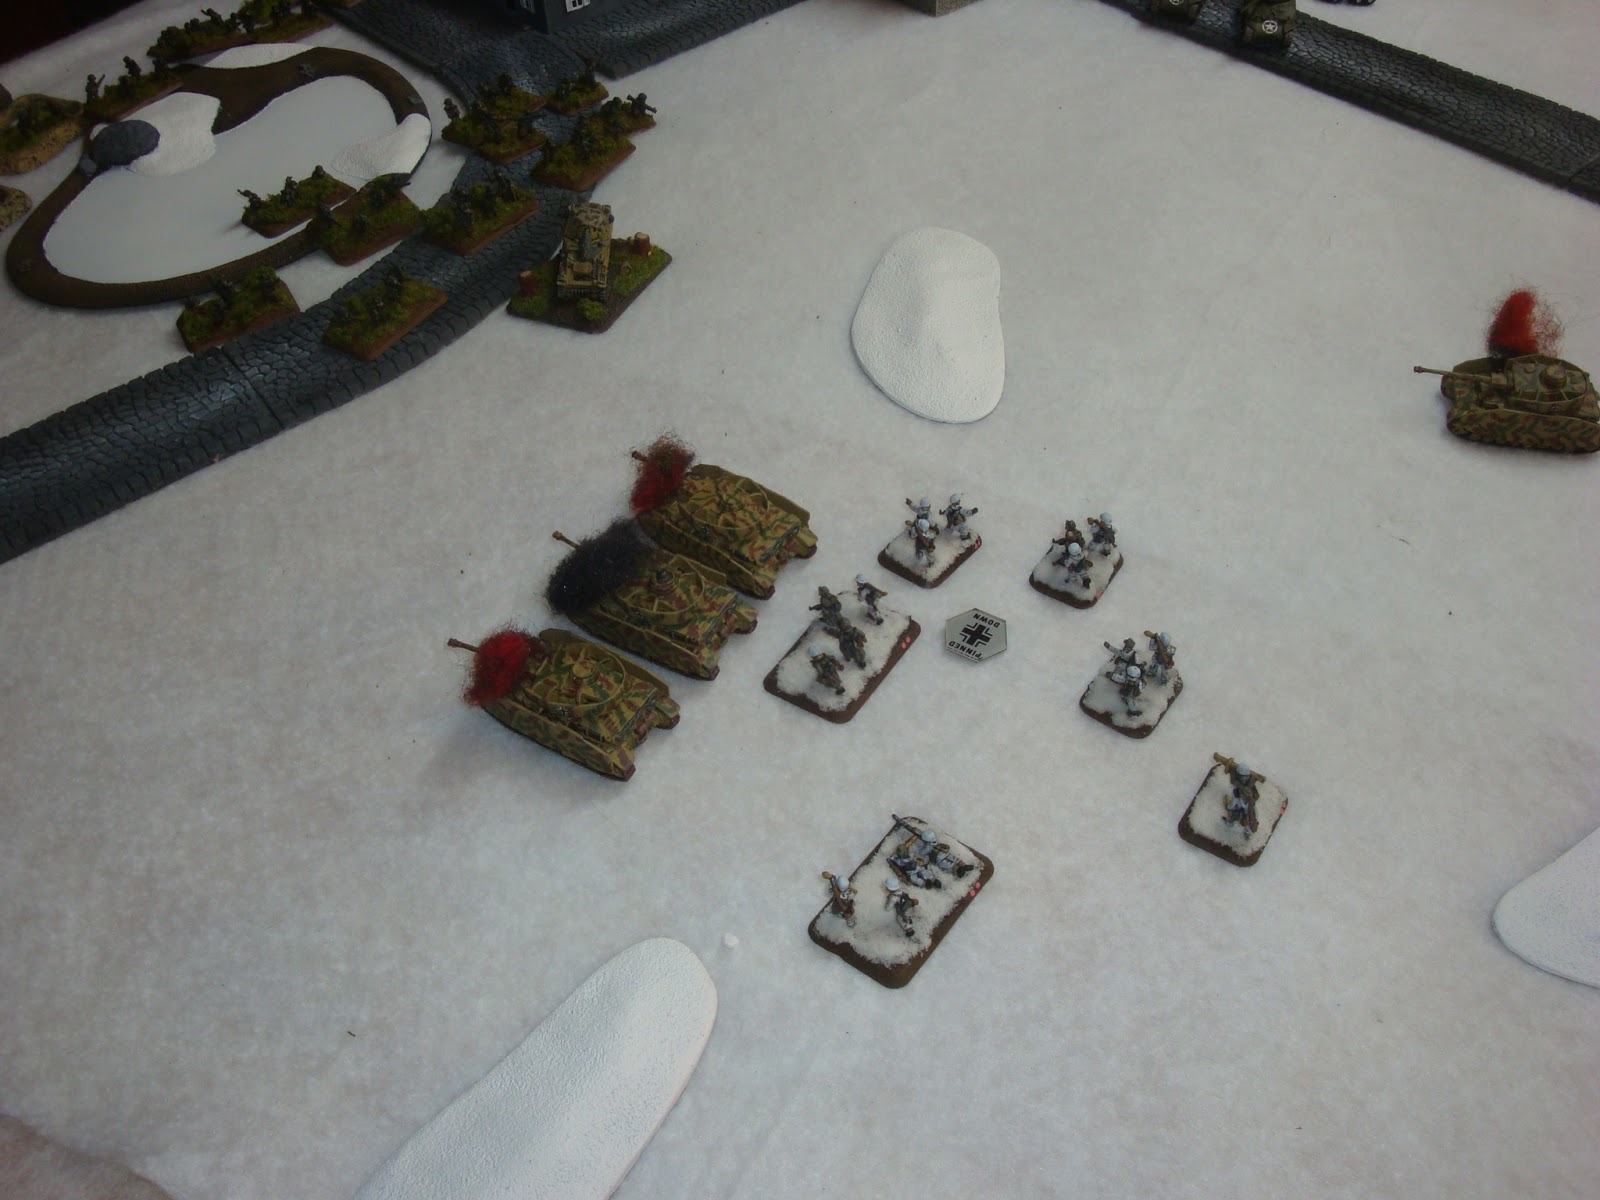
| The German fire kills off a few Paratrooper teams and the surviving Panzers and PGs assault the American lines. |
 |
| The assault goes back and forth, 75mm guns and MGs vs. bazookas and Gammon bombs. |
 |
| More Americans join the fight . . . |
 |
| The Germans kill enough Paratrooper teams to rout the Americans, but the Paratroopers knock out two Mk IVs and bail out another, causing the Panzers to route as well. |
 |
| The lines are deserted around the objective ... |
 |
| More Germans move up to cement their victory! |
 |
| There aren't many left though, and American reinforcements are starting to mass as well. |
 |
| The Shermans dispatch the remaining Panzer Mark IV. |
 |
| The new Paratrooper platoon contests the objective. |
 |
| So few PGs remain. And they are pinned down as well. They do pass a company morale test after losing both Panzer platoons and a PG platoon so their morale must be tolerable. |
 |
| With more US reinforcements imminent, the German survivors concede and retreat back to the woods. |
Unlike the description in the books, Foy has resisted attacks by both Germans and Americans. I think I should have gone more rapidly towards the US lines and perhaps smoked the AT guns with my 81 mm mortars, who didn't cause much damage to the dug in Paratroopers. Since I have a 120 mm mortar platoon on the painting list, heavier indirect fire is close at hand.


2 comments:
Wonderful report, atmospheric and beautiful, love the German infantry in winter camouflage as well...
Thanks. I really like the Late War Germans as well. The poses are neat (especially with the panzerfausts and assault rifles) and they paint up nicely. I thought the winter camouflage wouldn't look that nice but after following Battlefront's instructions in the "Nuts" book I am hooked. I do like the Vallejo paints better, but that's a minor quibble.
Post a Comment