On to the main event!
 |
| The first Cromwell continues to burn from Part I. |
 |
| Tigers on the northern road poke cautiously around the corner, wary of the Firefly down the road. |
 |
| Panzer Lehr panzer IV Hs trade shots with the British Armour and get a barrage from the Sextons in reply. |
 |
| A Panzer Mk IV H burns following the barrage, proving that even 25 pdrs can kill a tank every so often. |
 |
| The first Tiger kill by a Firefly down the road. This has me concerned as I have yet to kill much of anything and have already lost three tanks, including a FV Tiger and my panzer Lehr Company Commander. On the other hand the Tigers in the upper portion of the photo are about to make a sharp turn . . . |
 |
| . . . and drive through an unsuspecting townhouse! |
 |
| Meanwhile the 2iC finally unbogs and drives through a line of houses with 2 other Panzer Mk IV Hs. Another Panzer Mk IV H is bogged down on the other side. |
 |
| The southern panzer zug is still getting stuck on hedgerows. |
 |
| One over and two bogged down is not a good sign. |
 |
| The housewarming Tigers manage to smoke another Cromwell at very short range. |
 |
| The Stuarts are fired upon by the Panzer Lehr 2iC and friends. Little damage beyond bailing one Stuart out is achieved. |
 |
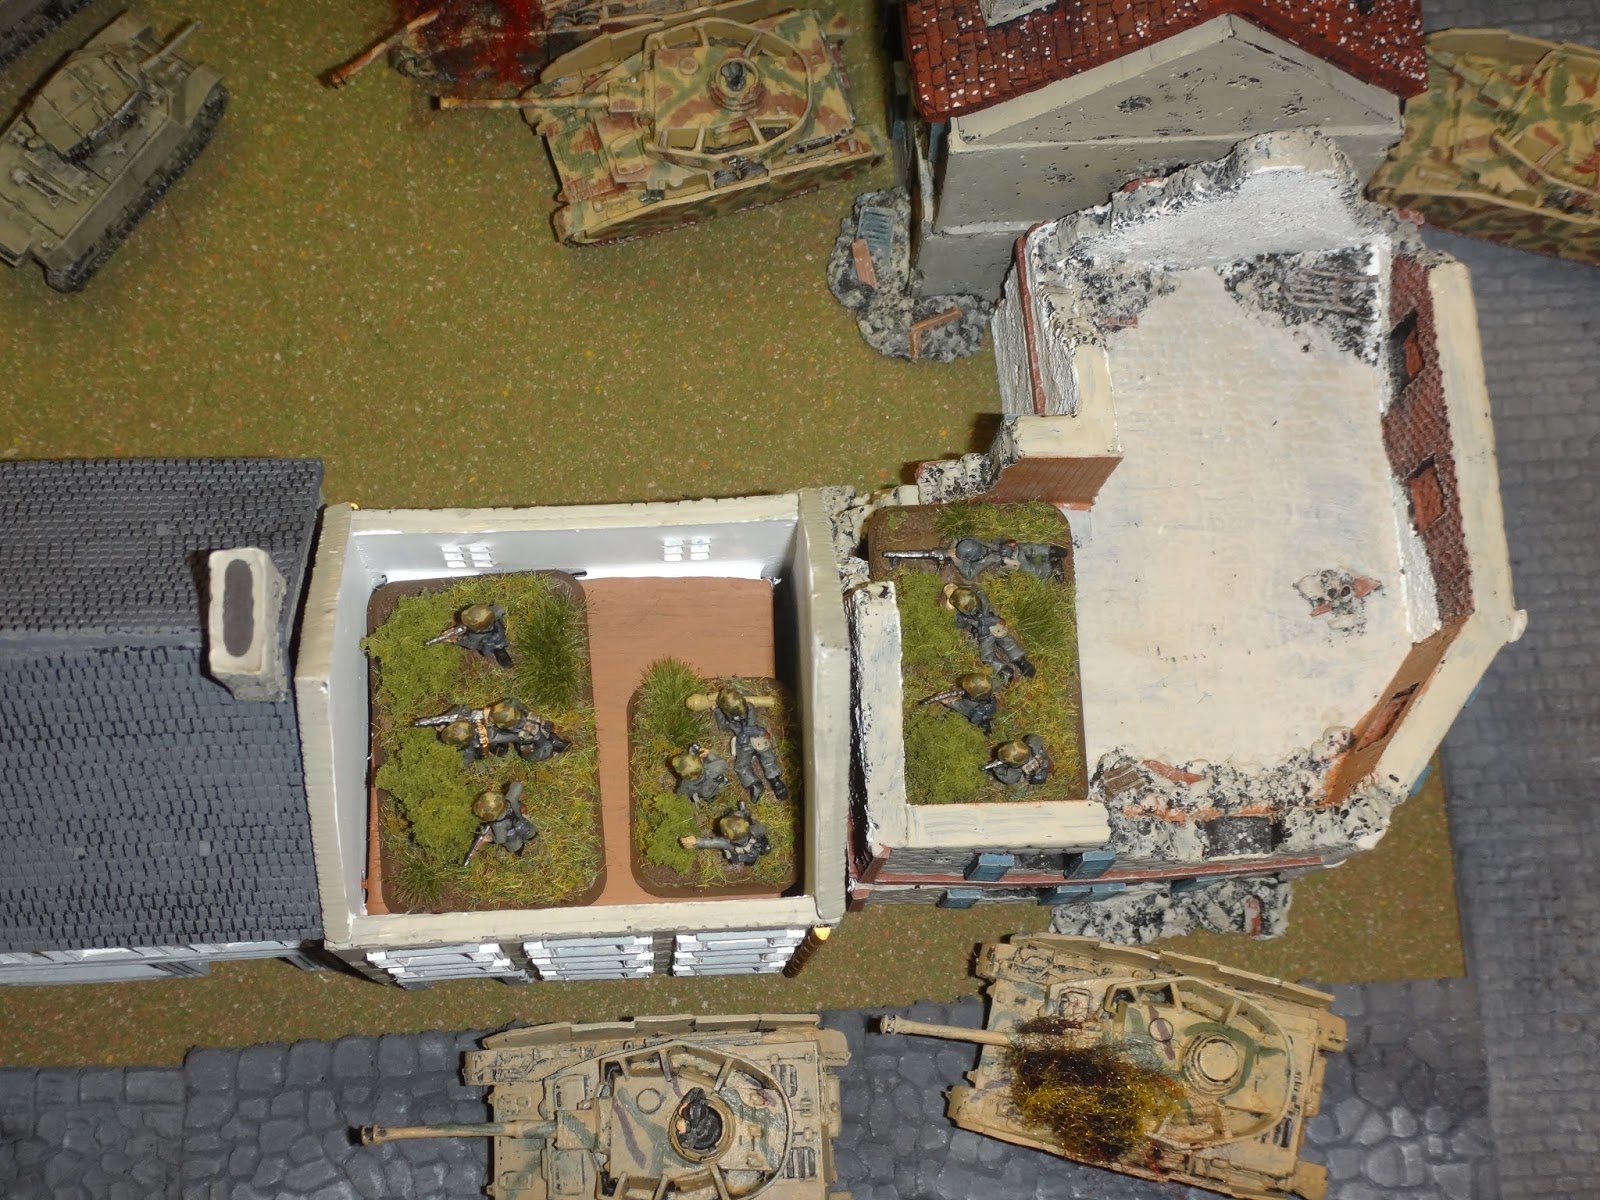
| SS Panzergrenadiers move house to house to cover the Tigers and move closer to the objective. |
 |
| The Panzer Lehr motorcycle troops dismounted and occupied the southern string of houses. |
 |
| The Brits unleash their two platoons in ambush. The first is an armoured platoon that fires at the Panzer Mk IV Hs hung up on the hedgerow. |
 |
| A closer view. |
 |
| Three Cromwells and a Firefly blast away. |
 |
| Two Panzer Mk IV Hs are brweed up forcing a morale check which the Germans lose. Scratch one zug! |
 |
| The second platoon comes out and blasts away at the Tigers in the house but cause no damage. |
 |
| The other British Armoured platoon lights up another Panzer Mk IV H platoon leaving no survivors. Two zugs gone! |
 |
| With two Panzer Mk IV H zugs toast and my Company Commander also in flames, the German southern attack is thwarted. Things are looking serious. . . |
 |
| The Tigers blast the northern Firefly. This is good! |
 |
| The other Tigers sneak around the line of houses and with their Panzer Lehr kamerades, shoot up a British Armoured platoon, destroying two Cromwells and a Firefly and bailing out two other Cromwells, including the Company Commander. This is also good! The tide is shifting. . . |
 |
| The motorcycle troops redeploy towards the undefended destroyed Cromwell objective. The Panzer Lehr Panzer Mk IV H panzer that bogged down earlier unbogs and takes station in the square. |
 |
| The Tigers mass to shoot at the Tommies near Herr Wittman's objective. |
 |
| The British Commander withdraws one armoured platoon back down the road to the last objective. |
 |
| An infantry platoon repositions to menace the Tigers with their trusty PIAT. |
 |
| The SS Panzergrenadiers continue to move up, house by house. |
 |
| The center force of Panzer Mk IV Hs turn to the Stuarts but only manage to bail them out. |
 |
| The British tanks fire at the Tigers but to no avail. Even with PIAT and artillery fire the British are only able to bail out three Tigers. It will not be enough. |
 |
| The Stuarts are disposed of. |
 |
| The British throw more reinforcements in to stop the Tigers. |
 |
| The Tigers kill another Cromwell and Firefly, destroying another British Armoured platoon. The British pass their moral check despite being under half strength. |
 |
| Panzer Lehr motorcycle troops and the repositioned halftrack park move to defend the last objective. |
 |
| The Tigers pound the defending British infantry. |
 |
| The Panzer Lehr 2iC and friends move past the burning Stuarts to assist the Tigers. |
 |
| A lone Panzer Mk IV H guards the village square. |
 |
| The last remaining British armoured platoon attempts to vault the hedgerows to menace the remaining objective and light up the German halftracks. Will they get there in time? |
 |
| The valiant British Company Commander regains his tank and fights on! |
 |
| . . . only to be killed by the German tank horde. With their Company Commander gone, the remaining British armour routs, leaving the poor Tommies to fend for themselves. |
 |
This is not enough! The Tigers assault the infantry at the objective and kill a stand despite defensive PIAT fire. The Tommies fail their morale check and run away! Discouraged, the British concede the game.
|
Whew! I thought the Brits were going to win after I had lost two Panzer Mk IV H platoons and my Panzer Lehr Company Commander, but the very next turn superior German gunnery (aka dice) wiped out two British armoured platoons in kind, shifting the initiative to the Germans. There were certainly chances for both sides to win, evidence of a well crafted scenario. I think the British could have saved the 6 pdrs for the infantry dug in at the one objective to make it more challenging for the Germans. Smoke from the Sextons may have helped, though with the narrow roads their are only so many places to go. The tank density IS high, but not insurmountable. Infantry did very little here, which may be poor tactics on our part.
All in all a very satisfying game, particularly since I won. I am sure we missed a couple of things here, which is why we will try again next weekend, though changing sides this time. Stay tuned!


5 comments:
Excellent game report. Well done on creating it. Fanatstic table and a big commitment to gaming to get it to this stage. Thanks for sharing. It was a ver enjoyable read.
Great looking battle report! We would love to feature a link to it in this weeks update. Please let me know if you would be okay with this.
Regards
Chris at Battlefront
Chris,
Sorry for the delay! Please do. It is a fun scenario and I hope others would try it. Thanks.
...Followed the BF link.
Looks to me like a cracking good game: I'm jealous!
Silly question maybe, but is it tricky to manage the logistics of infantry swarming through all those adjacent and multistorey buildings?
Herr Admiral,
I remove the roof tops of the houses with the infantry in them when it gets mobile. The Brits typically are stationary so we can leave the roof tops on. My opponent is my son so we generally aren't too sneaky. We've played this three times now and the infantry density isn't that bad; it's the tanks and ATGs that get all the action.
R,
PanzerCDR
Post a Comment